Creating a static blog site with Astro and Hygraph in under 5 mins
Jan 05 2024
There are many different ways to combine headless CMS and front-end frameworks, but in this blog post, I will show you one of the fastest way to create a highly-customizable static blog site that provides excellent developer and content curating experience in about 5 minutes.
(I am going to proceed assuming you have some basic knowledge of Astro)
Setting Up
- First, create a hygraph account and use a
Basic Blogtemplate for a new project. This will give us some sample schemas and data to work with.
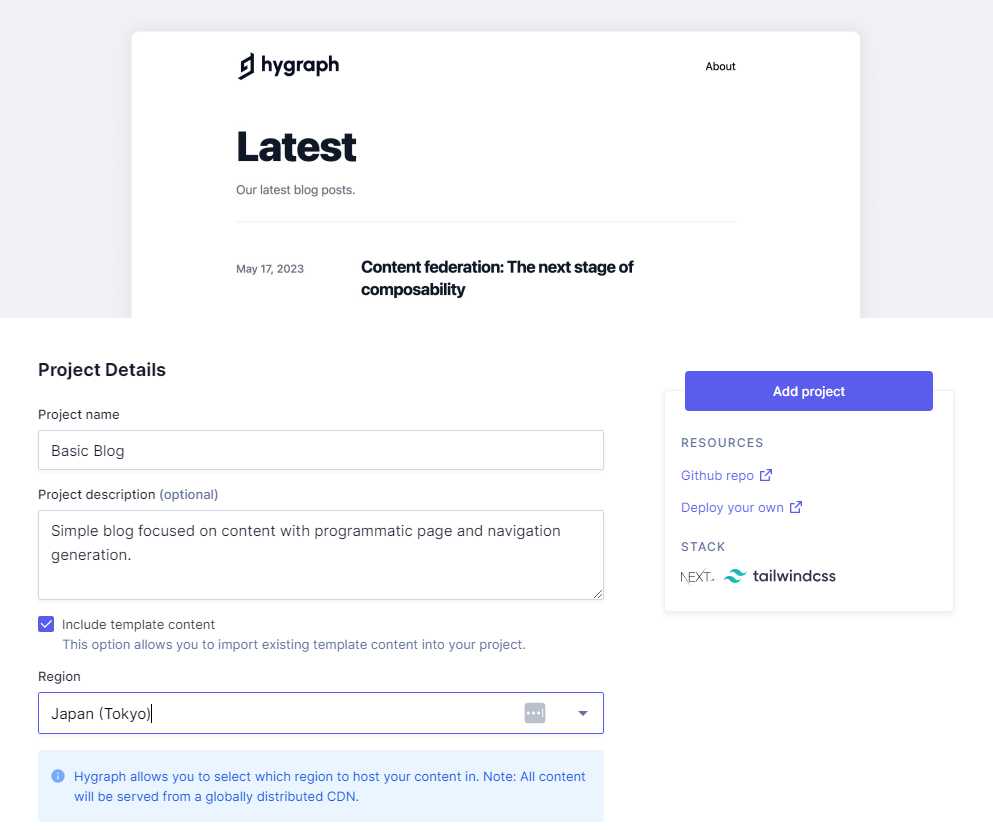
- Select any region you like and click Add Project. (You might need to refresh the page if it keeps loading.)
- After creating the project, go to Content > Post and you should see two posts:

- Blue stages indicated that there are changes after the post is published. You can modify the data if you like but we will work with the original.
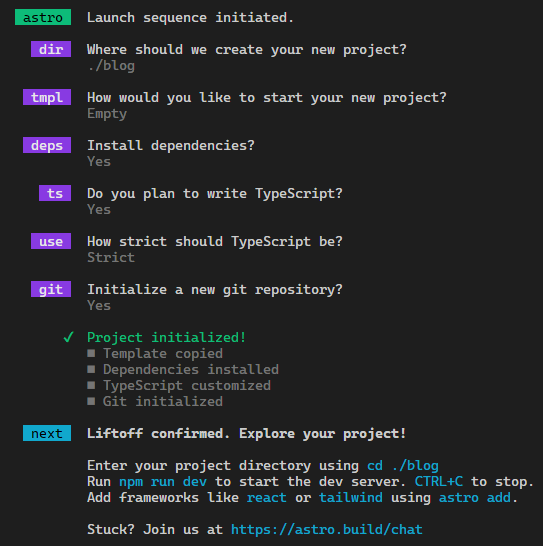
- Then, create an empty Astro app by running
npx create-astro@latest. Also, you should initialize github repo since we will be deploying to vercel.
- We will also use tailwind to style our page (I won't style the page too much in this tutorial but you are free to add your own styles).
- Run
npx astro add tailwindto add tailwind to our project.
- Next, run
npm install -D @tailwindcss/typographyto add the typography library. We will be using it to style the posts. - In
tailwind.config.mjs, addrequire('@tailwindcss/typography')to the plugin list to enable it.
- Now there is one last thing we need to do before we write the codes.
- Go to Hygraph Project settings, in
API Access, copy theContent APIurl. Go to the project root folder, create a.envfile with the contentHYGRAPH_ENDPOINT=[YOUR_URL]
Preparing Astro Front-end
The src folder should look like this:
src/
└── pages/
│    └── index.astro
└── env.d.ts- Create a
layoutsfolder and a fileLayout.astroinside of it
- Paste the following content inside:
Layout.astro
---
interface Props {
	title: string;
}

const { title } = Astro.props;
---

<!doctype html>
<html lang="en">
	<head>
		<meta charset="UTF-8" />
		<meta name="description" content="Astro description" />
		<meta name="viewport" content="width=device-width" />
		<link rel="icon" type="image/svg+xml" href="/favicon.svg" />
		<meta name="generator" content={Astro.generator} />
		<title>{title}</title>
	</head>
	<body>
		<slot />
	</body>
</html>- Create an
utilfolder with agetPost.tsfile in it. We will be using it to fetch the posts from Hygraph.
getPost.ts
type Post = {
  title: string;
  slug: string;
  date: string;
  content: {
    html: string;
  };
  coverImage: {
    url: string;
    width: number;
    height: number;
    altText: string;
  };
};

export default async (slug?: string) => {
  const query = {
    method: "POST",
    headers: { "Content-Type": "application/json" },
    body: JSON.stringify({
      query: `
        {
          posts(where: {${slug ? `slug: "${slug}"` : ''}}) {
            title
            slug
            date
            content {
              html
            }
            coverImage {
              url
              width
              height
              altText
            }
          }
        }`,
    }),
  };

  const response = await fetch(import.meta.env.HYGRAPH_ENDPOINT, query);
  const json = await response.json();
  const posts: Post[] = json.data.posts;
  return posts;
};- Then in
pagesfolder, create apostfolder with file[post].astroin it. It uses dynamic routing and shows all posts fetched from Hygraph.
[post].astro
---
import type { GetStaticPaths } from "astro";
import getPost from "../../util/getPost";
import Layout from "../../layouts/Layout.astro";

type Props = {
  post: string;
};

export const getStaticPaths = (async () => {
  const posts = await getPost();
  return posts.map((post) => {
    return {
      params: {
        post: post.slug,
      },
    };
  });
}) satisfies GetStaticPaths;

const { post } = Astro.params;
const posts = await getPost(post);
const currentPost = posts.find((fetchedPost) => fetchedPost.slug === post)!;
---

<Layout title={currentPost.title}>
  <main class="prose mx-auto my-12">
    <h1>{currentPost.title}</h1>
    <div>{currentPost.date}</div>
    <div class="flex justify-center">
      <img
        class="object-contain h-[400px] w-auto"
        src={currentPost.coverImage.url}
        alt={currentPost.coverImage.altText}
        width={currentPost.coverImage.width}
        height={currentPost.coverImage.height}
      />
    </div>
    <article set:html={currentPost.content.html} />
  </main>
</Layout>- Lastly, we will modify the
index.astro:
index.astro
---
import Layout from "../layouts/Layout.astro"
import getPost from "../util/getPost"
const posts = await getPost();
---

<Layout title="Main Page">
	<div class="prose mx-auto my-16">
		<h1>Blog</h1>
    {
      posts.map((post) => (
        <div>
          <h2>
            <a href={`/post/${post.slug}`}>{post.title}</a>
          </h2>
        </div>
      ))
    }
	</div>
</Layout>
Your src folder should now look like this:
src/
└── layouts/
│    └── Layout.astro
├── pages
│    └── post
│          └── [post].astro
├── util
│    └── getPost.ts
└── env.d.ts
You can now run npm run dev to see the blog is working already!

Click on any of the post:

As you can see, the site already looks pretty nice even though we barely styled it, thanks to the typography plugin from tailwind.
And that is it! All that is left is to deploy and create a webhook.
Deploying to Vercel
First, commit all the changes to a github repo. Then create a new project in vercel and import the git repo you just created. Make sure that you add in the HYGRAPH_ENDPOINT environment variable as well.

If everything goes accordingly, you should see deploy success.
Webhook
Last but not least, the crucial part for most headless CMS is to add a webhook so any update to the content will trigger a rebuild.
Go to Vercel Settings > Git and Deploy Hooks, create a hook with your github branch (main or origin in most cases).

Copy the url and go to Hygraph dashboard. In Webhooks, choose Add Webhook.
- Give it a name
- Exclude payload
- Paste in the url you just got
- Select published for Stage so only published data will cause a rebuild

Voila, your blog site is set and ready. Any time you make a change to the content, the webhook will trigger and vercel will rebuild your site with the newly updated data.
Conclusion
There are endless possibilities with Astro and headless CMS. Not only can you generate static sites with Astro, you can also integrate it with other frameworks and optionally do Server-side Rendering, making Astro such a powerful framework. If you are interested to learn more about Astro and Hygraph and what you can do with them, feel free to dig deeper into their docs and you might find yourself enjoy working them the more you learn about them.
Last updated: Jan 19 2024
 :
:
 :
: